With everything set up, you are now ready to start working on your van. Remember, you are now going to be fiddling with the brain(s?) of the van itself, so you do run the risk of messing things up. I have heard claims that you may be able to brick your van when you do variant coding, however, I’m not really sure that’s true for most things. But as a precaution, keep all of this in mind and carefully document your own steps, including backing up coding files. You can upload entirely new ECU software and perform flashes in DTS Monaco, and I’m sure if those things go wrong, you can badly mess up your car, however, presumably a reflash back to stock can reverse the process. I won’t cover any of that here, since I haven’t done any of that in DTS Monaco, although I have used KessV2 to install the absolutely fantastic Kerma tune – but only via their direct help and instructions.
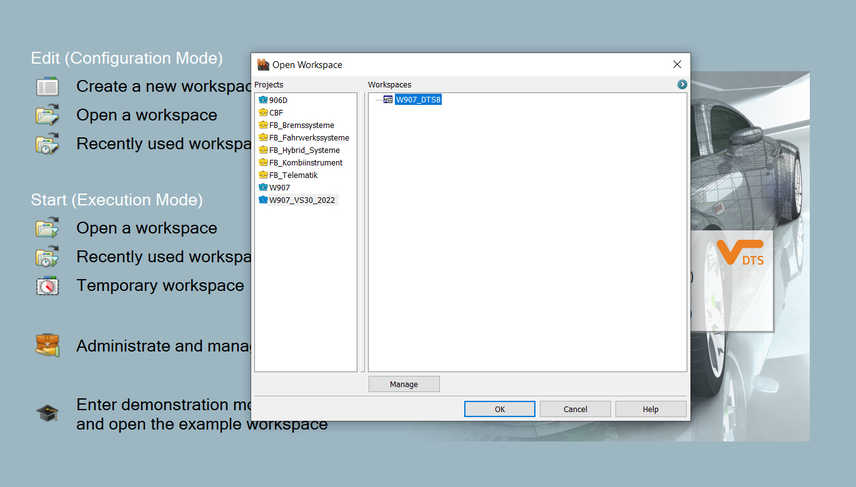
In the main DTS Monaco window, click the “Open a workspace” button and select the Workspace you just created. In the following, I’ll be using the Workspace I have been using for my van.
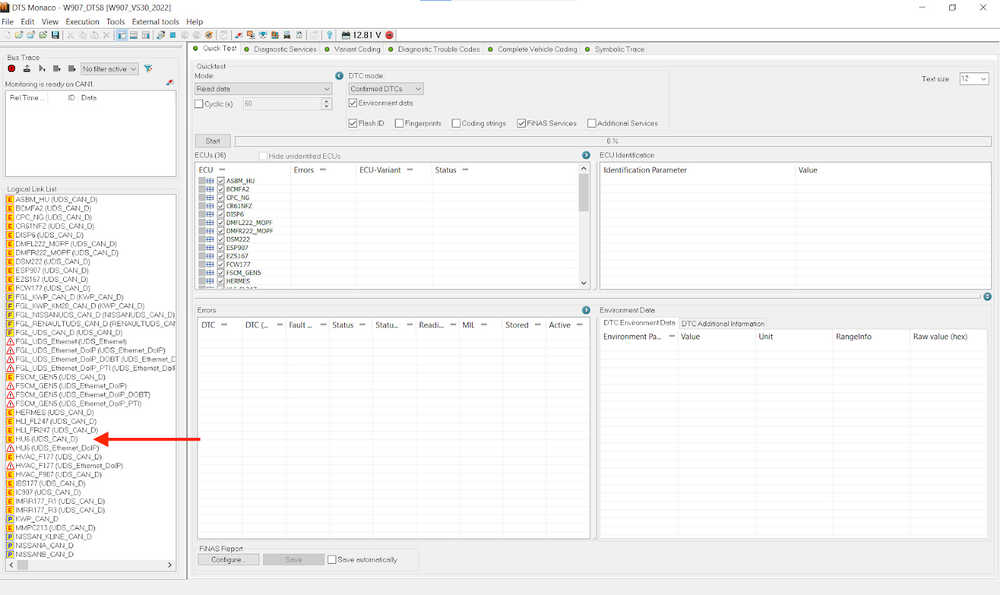
As per normal, it will ask you if you want to do an ECU update. Press NO. Wait for the program to load and you should now see your Workspace in DTS Monaco in all its glory. Remember those SMR-d files you imported as part of creating your Project? Those are the “Logical Links” on the left. Note, several versions are available because there are different interfaces that can connect – only the connected ones will work and be active. In the example below, you’ll see me having highlighted the “HU6” ECU that controls the MBUX.
Defeating the firewall(s)
Before you can start doing any variant coding in DTS Monaco you need to defeat a firewall. Softing, who created DTS Monaco, presumably put these in place to ensure that only Real Professionals can work on your van. Right.
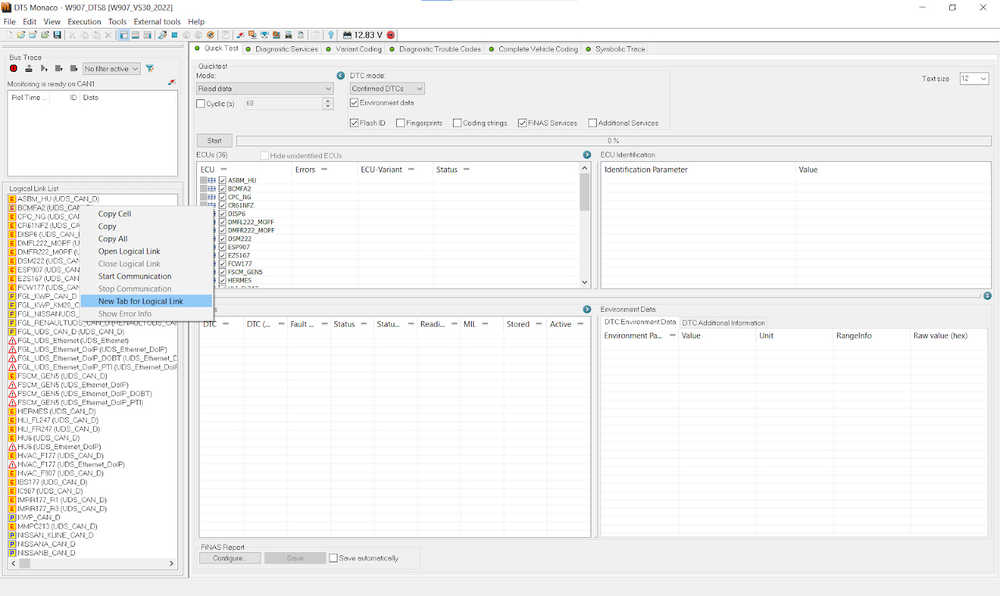
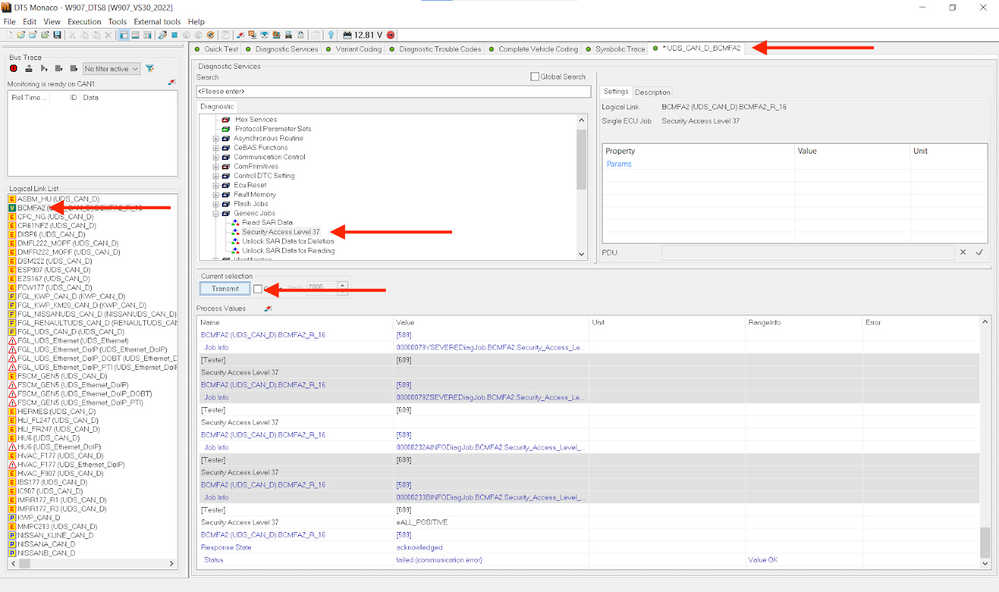
What firewalls are in place varies based on model year, etc. For my W907, I can open up the firewall via the EZS167 ECU, but before I show you how to do that, let’s first log into the BCMFA2 ECU, since that’s the way to open up the firewall in older vans. In the list of logical links, right-click on EZS167 and select “New Tab for Logical Link”. When you do this, you keep the link to that ECU open and you can have multiple ECUs open at the same time. In contrast, if you were to click through to this ECU via one of the tabs on top, you’d lose the connection once you click through to another one where you might want to do some coding. By having a single tab just for this ECU, you can ensure the connection is kept alive throughout your session.
Once that link is created, a new tab will open. In the new tab, go to “Generic Jobs” and select “Security Access Level 37”. Press the “Transmit” button and you should see a bunch of text in the window below. Provided that you see no text in red, in an older van, you should now have turned off the firewall.
In a newer van, however, the process is a little different and, as mentioned above, done via the EZS167 ECU instead. Do the same process as described above, but this time it’s “Security Access Level 3B”.
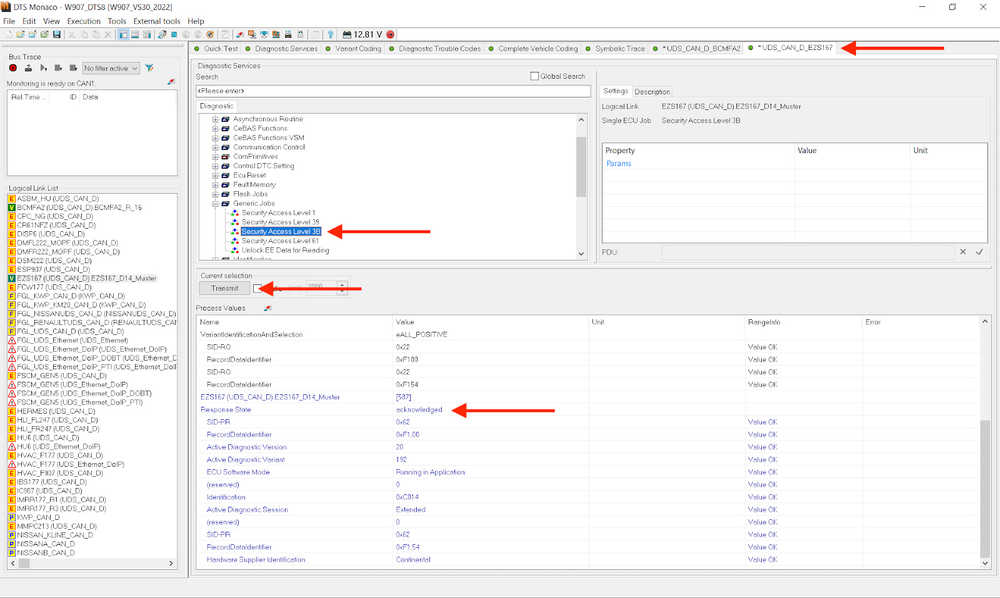
Click “Transmit” and provided that you see no red text and have “acknowledged” displayed under “Response State”, your firewall should now be deactivated.
Variant coding
Now, it is time to perform the actual variant coding. Open up the relevant ECU governing the features you want to change and open it in a new tab. In the example here, we open the MBUX’s “HU6” ECU. Once done, you first want to select the “Extended Start”and press Transmit in the new ECU tab you opened up:
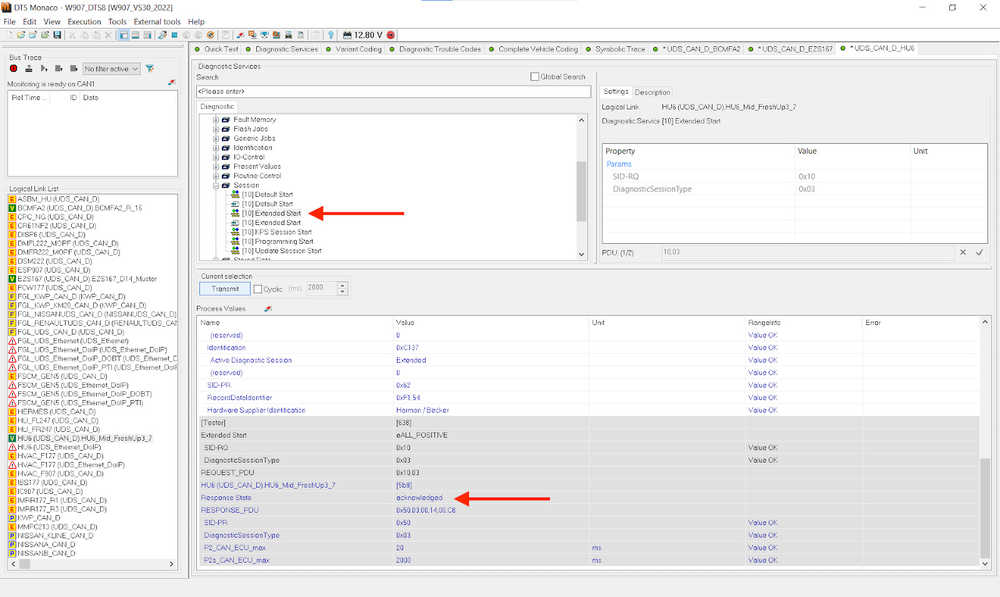
Provided that you correctly disabled your firewall and still have the relevant ECU (EZS167 and/or BCMFA2) open in a tab, you should see another “acknowledged” Response State. The ECU is now ready for coding.
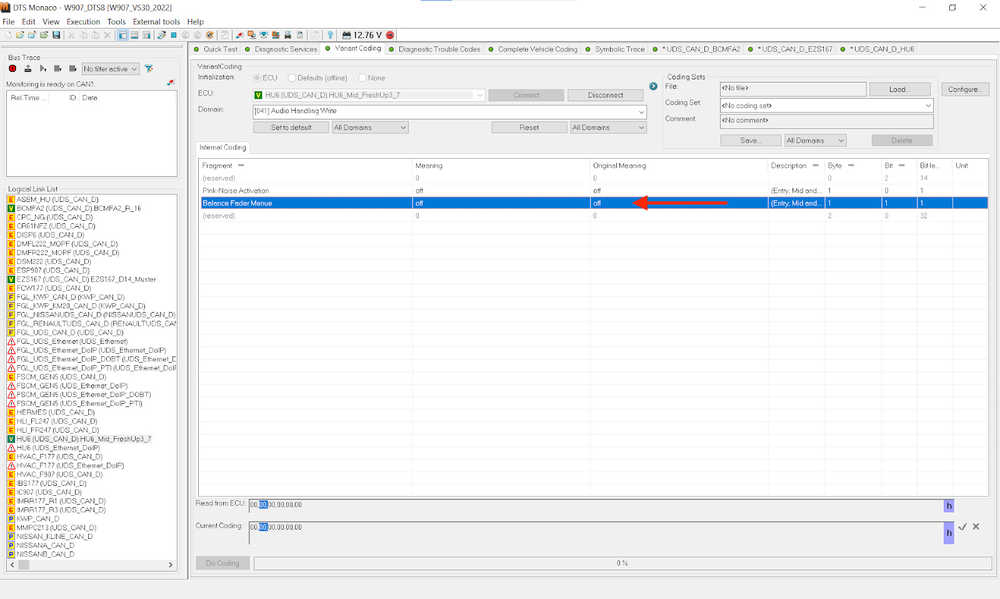
Go to the “Variant Coding” tab and select your ECU. It should connect – if not, press “Connect”. Underneath the ECU you will see the “Domain” list. This is where the functions of the ECU can be accessed and is where you will actually find the values to change. In the example below I select “Audio Handle Write” to add a fader and balance to the MBUX (well, I already had it set to “ON”, so in this example I turn it back “OFF”):
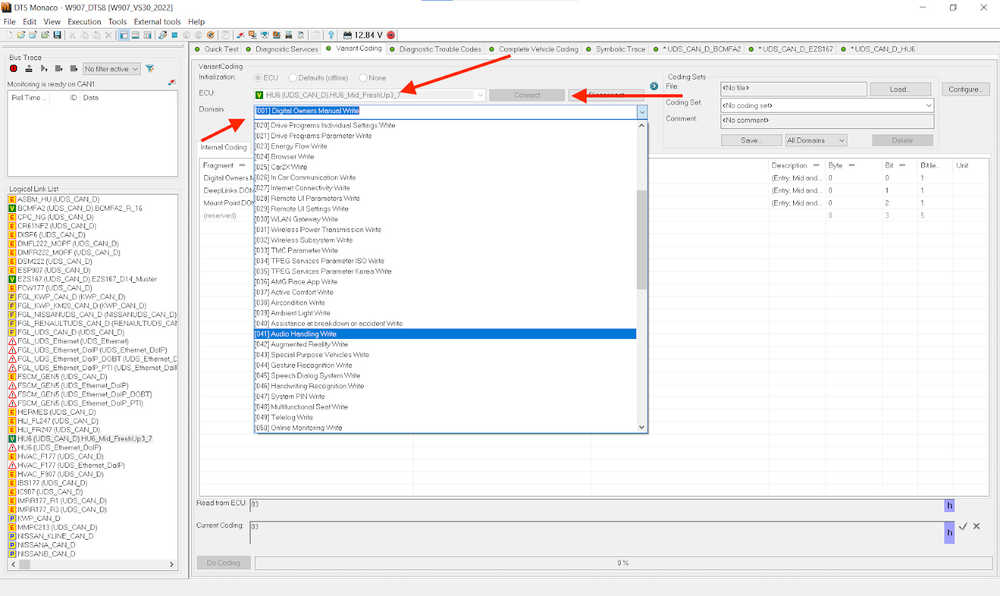
Find the relevant feature in the “Fragment” column – here, “Balance Fader Menue”. Double-click the value under “Meaning” (this is what you’ll change it to) and a dropdown menu will open up – select the new value you want. The original (or, rather, current) value is under “Original Meaning”:
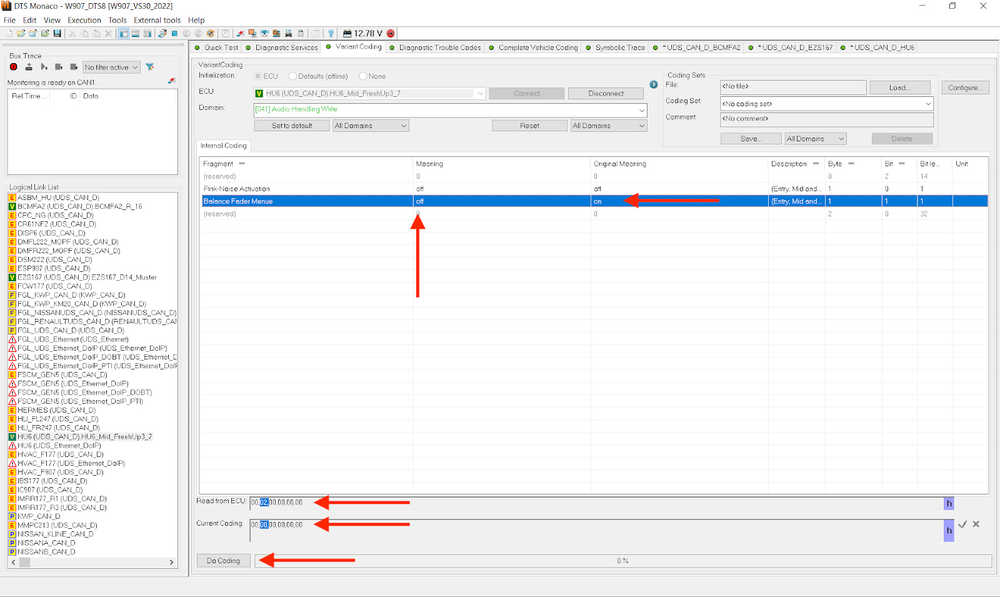
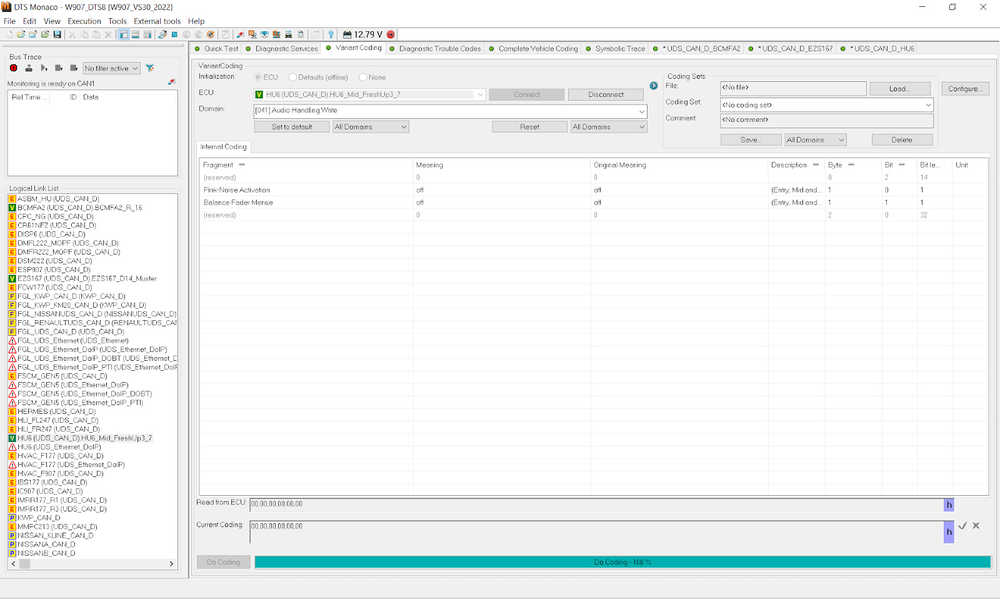
Also, notice the binary coding string under “Read from ECU” (what the ECU is currently coded for) and “Current Coding” (what you just selected). Once everything looks good, press the “Do Coding”. Provided that you have done all previous steps correctly, you should see no pop-ups and the bar next to “Do Coding” go to 100% and the new value presented under the “Meaning” column and Current Coding == Read from ECU.
IF you get a pop-up, Google the error code – something went wrong in previous steps. I would suggest restarting the session again. Did you turn off the firewall? Turn on Extended Start? Those ECUs still connected?
Provided that everything went as expected, your ECU should now have the new values. HOWEVER, they haven’t actually transferred yet, so you need to go through a few additional hoops. Last step.
Making new variant coding values permanent
In older vans, a “Hard Reset” of your ECU should be sufficient to make your coding changes permanent, however, for newer vans, you need to go through a few more steps, so let’s do that first.
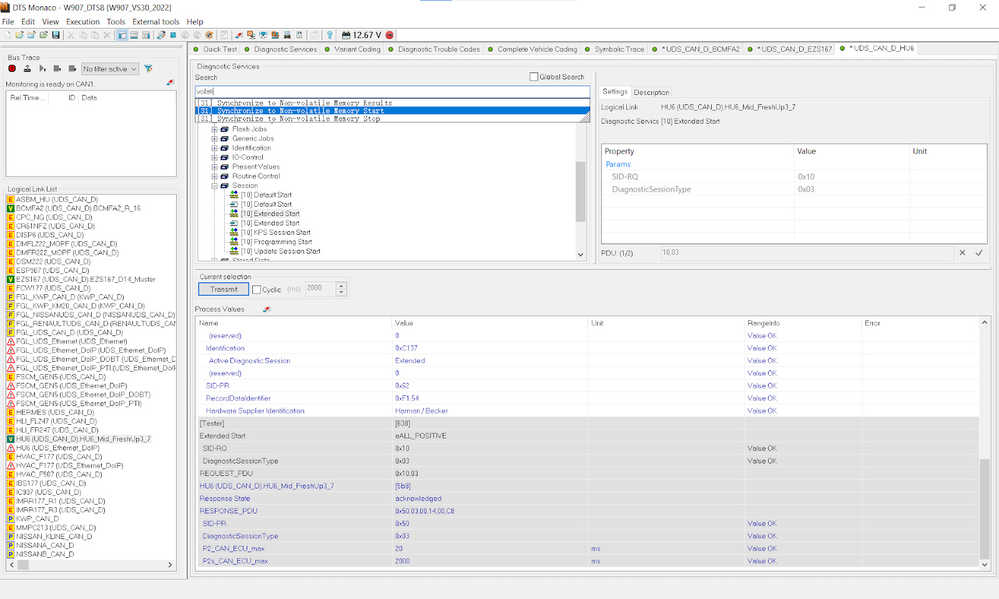
Click back to the open tab with the ECU you just changed variant coding for. In the “Diagnostic Services” search box, first find the “[31] Synchronize to Non-volatile Memory Start”. Click Transmit, and provided everything upstream was done correctly, you should get an “acknowledged” Response State and no red text.
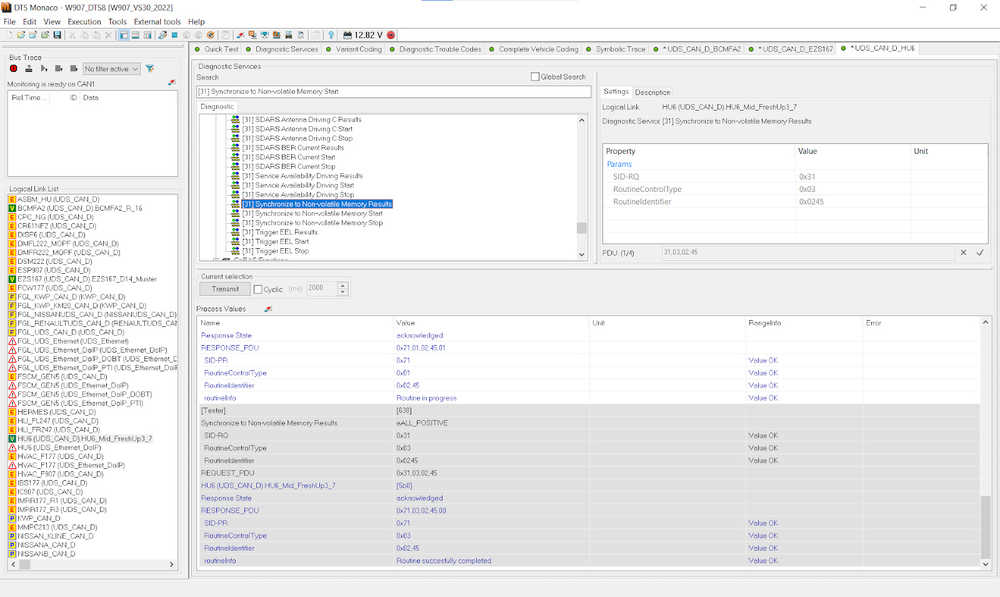
Next, click “[31] Synchronize to Non-volatile Memory Results”, followed by Transmit. Again, you should get an “acknowledged” Response State.
Now, it’s time to perform the Hard Reset of your ECU:
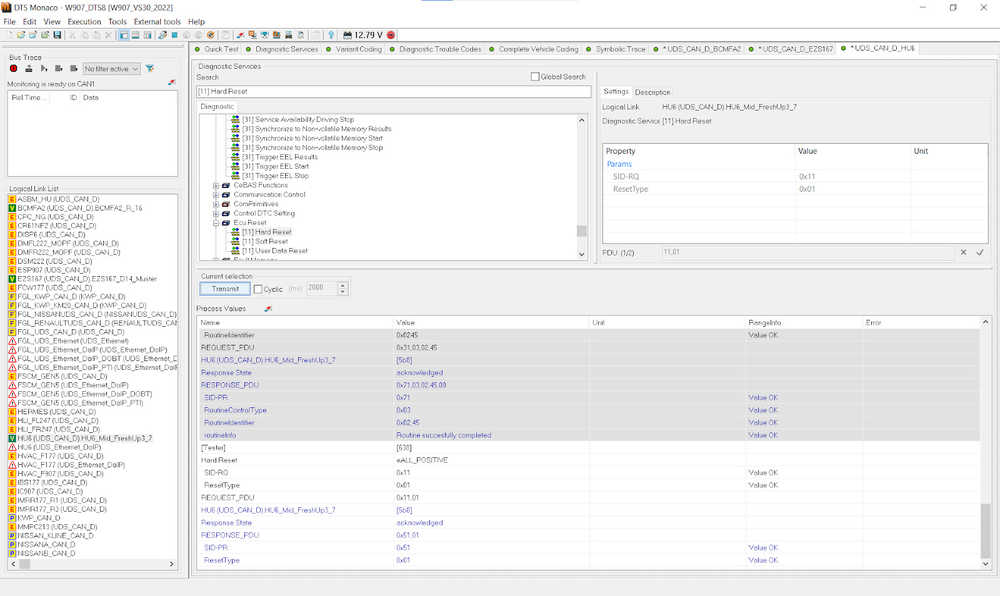
Do a Hail Mary, turn off the van, open the driver’s door, wait a few minutes, do another Hail Mary, and provided that your van did blow up in flames, the changes should now be permanent! You can check that by turning on the van (engine off), logging into the relevant ECU and then checking – here, you’ll see my “Balance Fader Menue” is once again “off”.