In menu adaptation How to different Xentry functions in adaptations
XENTRY offers various diagnostic functions, including adaptations, which allow you to modify control unit settings. To navigate XENTRY’s adaptations, you’ll typically need to:
1) Select the relevant control unit, 2) Access the adaptation function, 3) Locate the specific channel you want to adjust, 4) Enter a login code if required, and 5) Save the changes.
Here’s a more detailed breakdown:
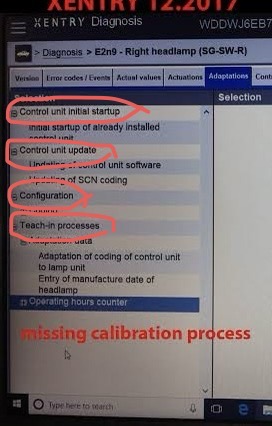
1. Selecting the Control Unit:
Navigate to the control unit or system you want to work with.
This might involve selecting the vehicle make and model, then navigating through a system tree to find the specific control unit.
2. Accessing the Adaptation Function:
Look for an “Adaptation” or “Coding” button or menu item.
This function will allow you to modify learned values and settings within the control unit.
3. Navigating Channels:
Once in the adaptation function, you’ll likely need to scroll through or enter a channel number to find the specific setting you want to adjust.
The channel number or name will indicate what the setting controls (e.g., throttle position, shift points, etc.).
4. Entering a Login Code (if required):
Some adaptation settings require a login code for security reasons. Enter the code when prompted.
5. Adjusting and Saving Values:
Use the “Up” and “Dn” buttons or other input methods to change the setting.
Save the changes once you’ve reached the desired value.
6. Confirming Changes:
Some systems will require you to click “Accept” or “Save” to finalize the changes.