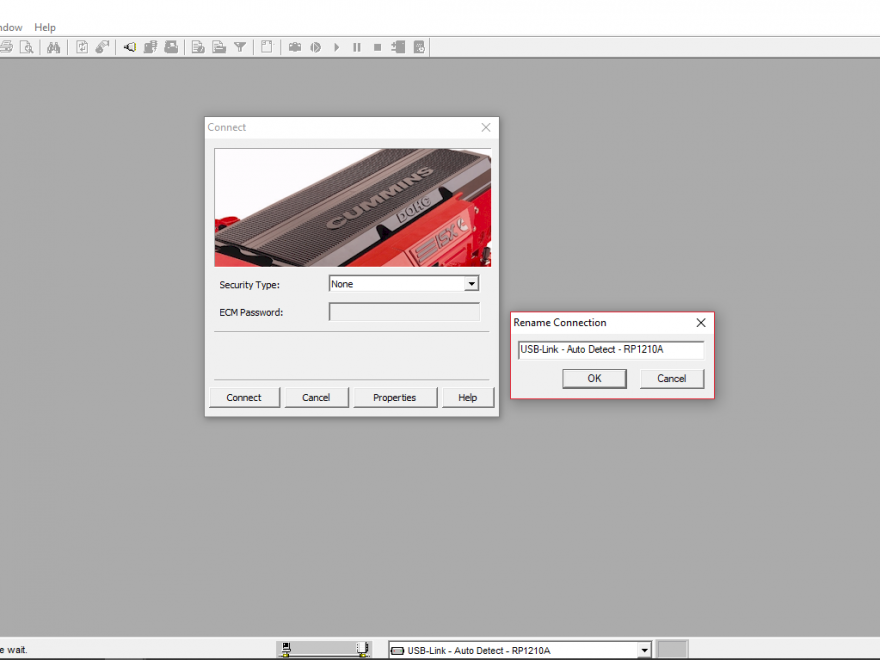
How to Connect CUMMINS Engines using Cummins INSITE Software
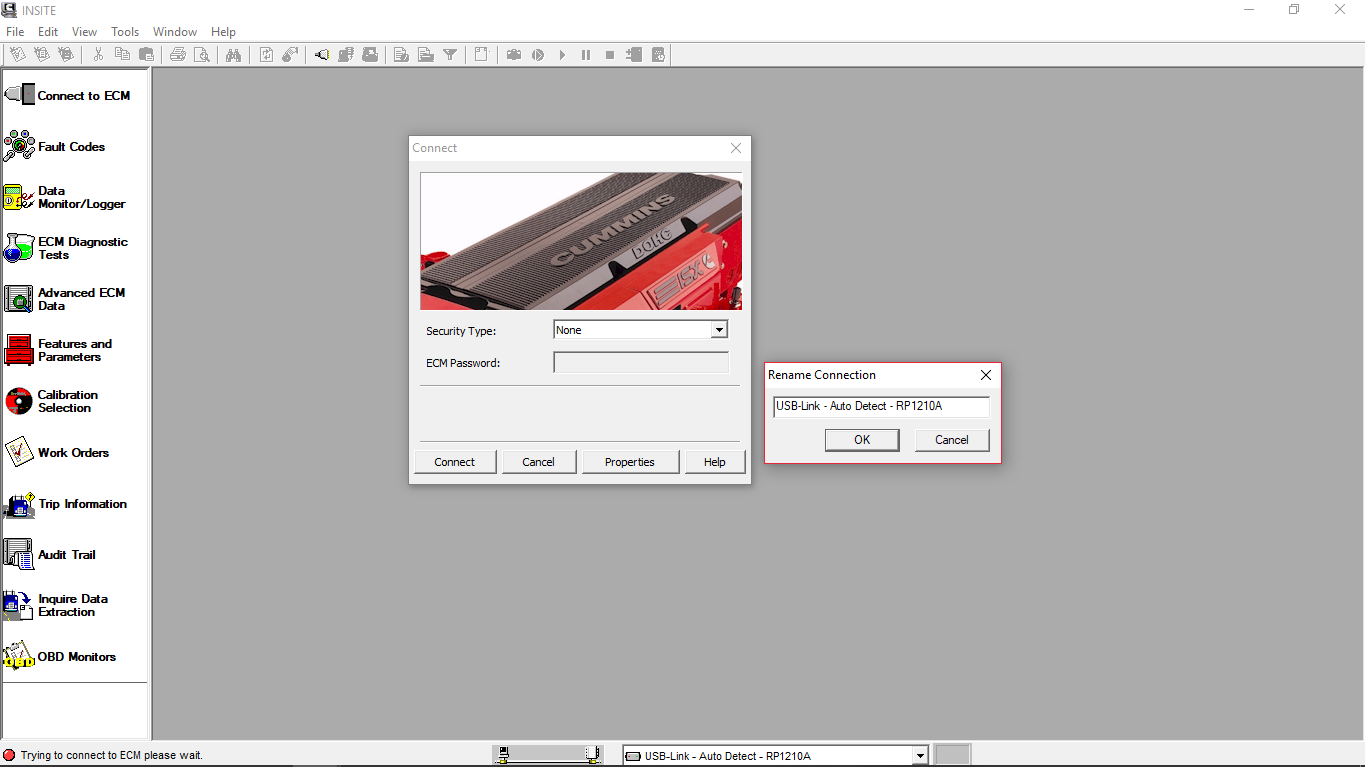
Proceed as follows:
Open “Cummins INSITE” via the shortcut on the desktop. Use the status bar to select connection options
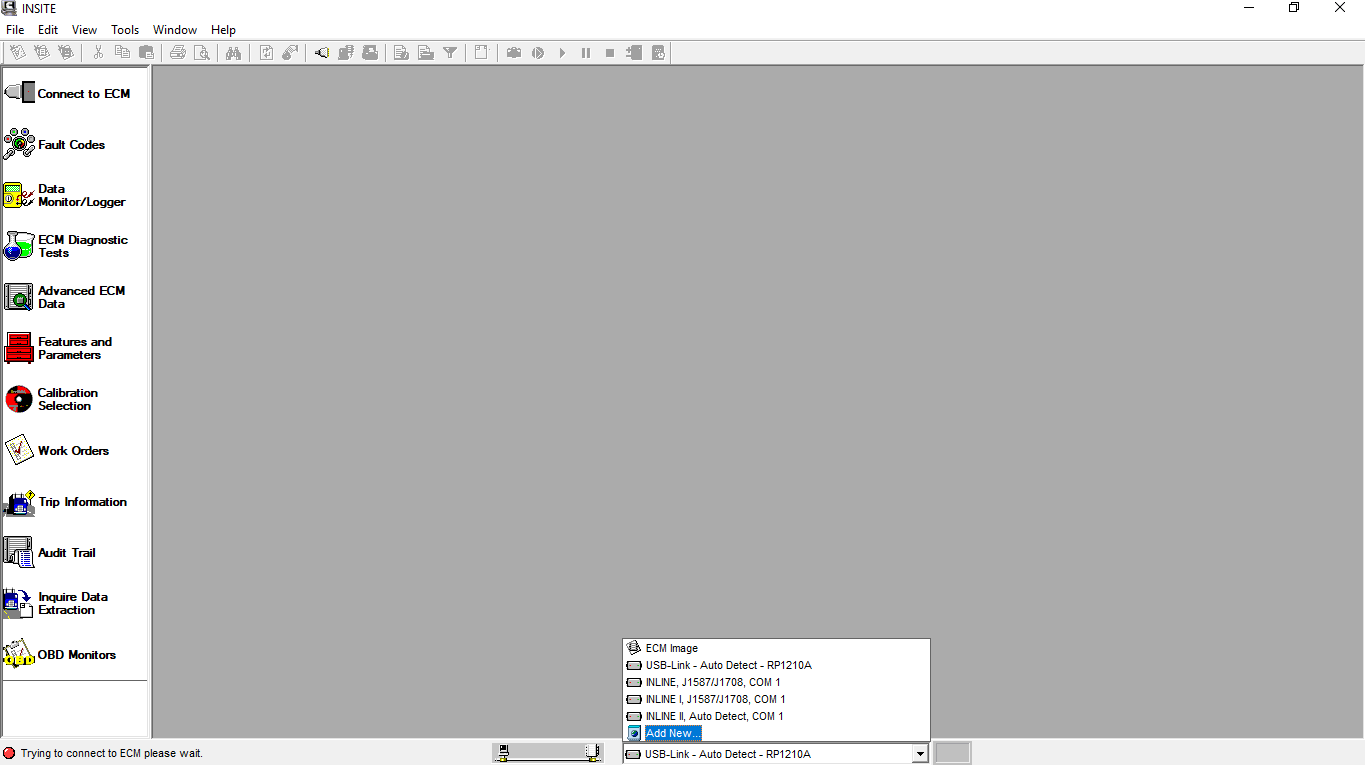
Figure 1.2 – Status bar (Connection Options)
Click the dropdown box on the “Status bar” to view a list of all currently available connection options, or click “Add New” to create one, then click “Next”.
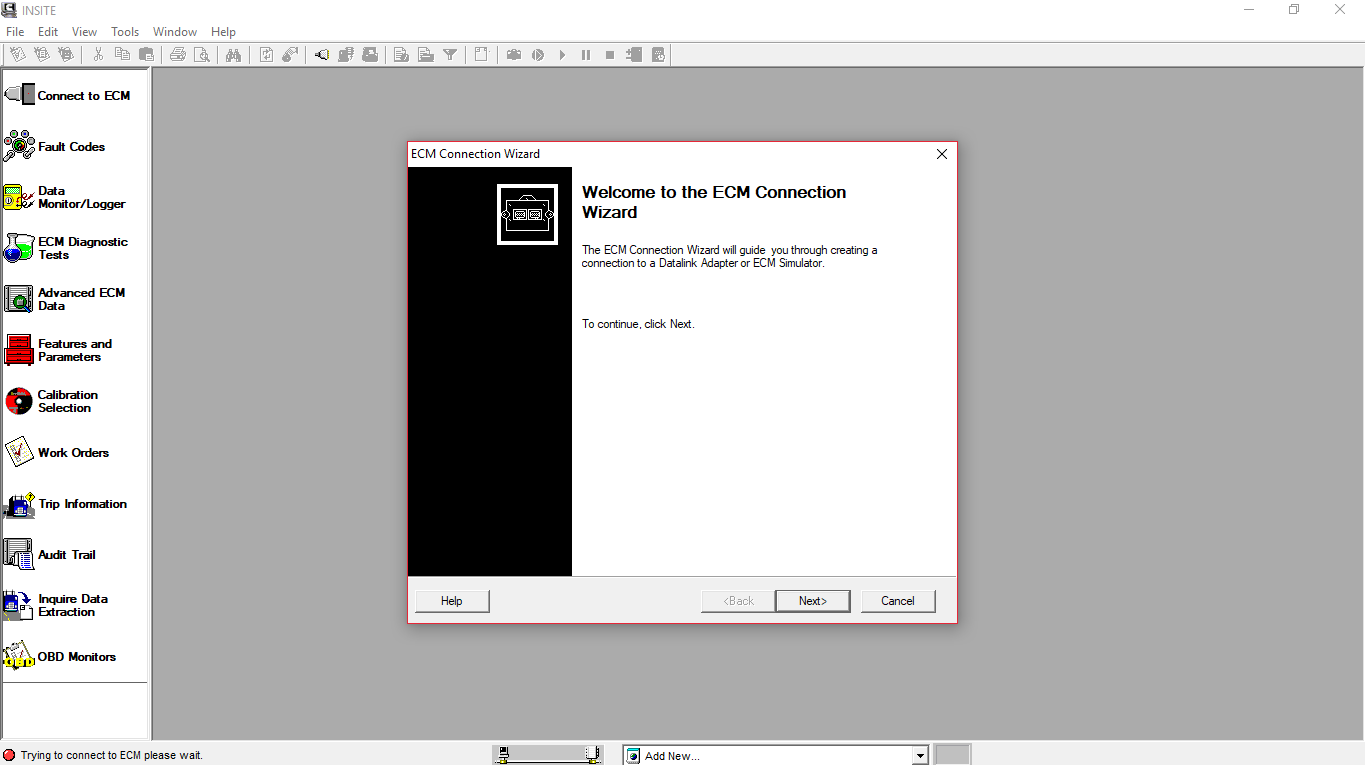
Figure 1.3 – ECM Connection Wizard
Use the “ECM Connection Type” page, and choose “Datalink Adapter” (Connect using a Datalink Adapter), then click “Next”.
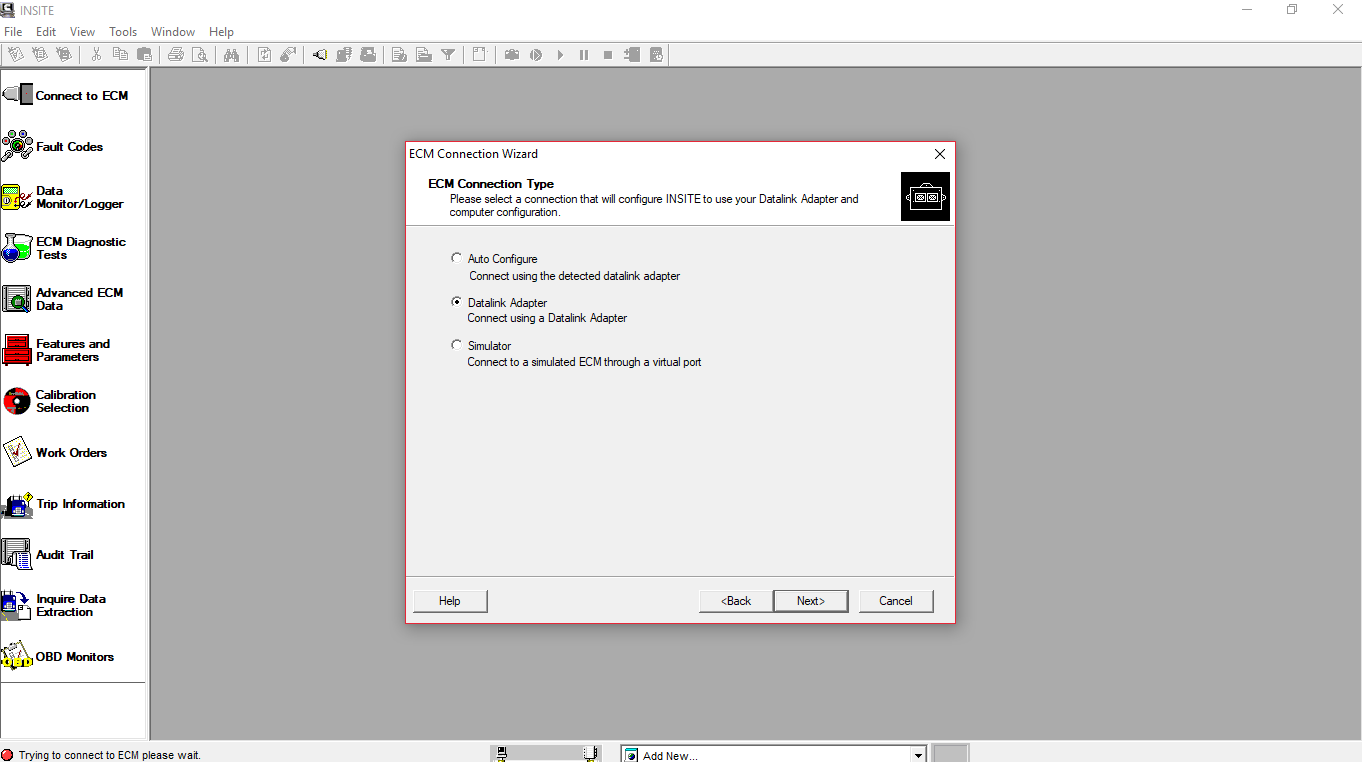
Figure 1.4 – ECM Connection Type
Choose “Connection Settings”, select your “Datalink Adapter Vendor”, “Datalink Adapter”, and “Datalink Protocol”, then click “Next”.
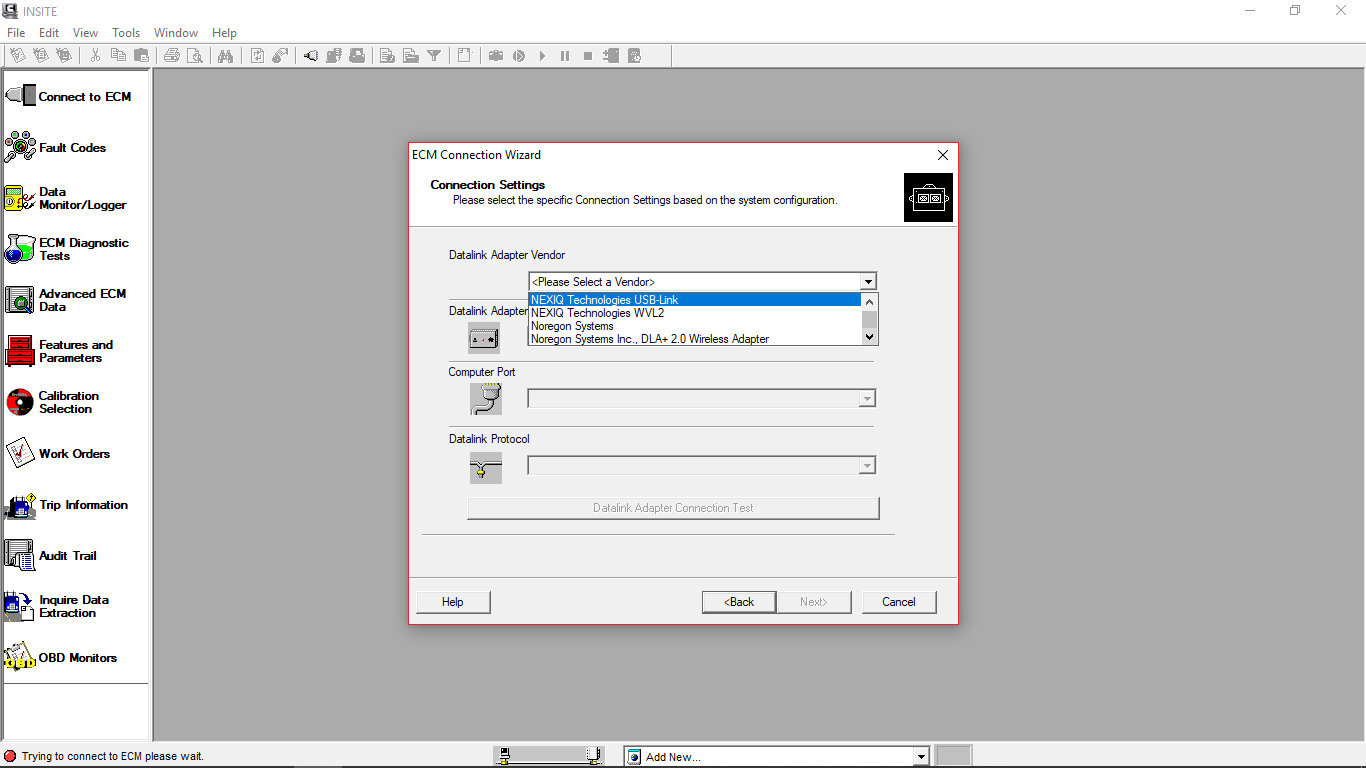
Figure 1.5 – Datalink Adapter Vendor
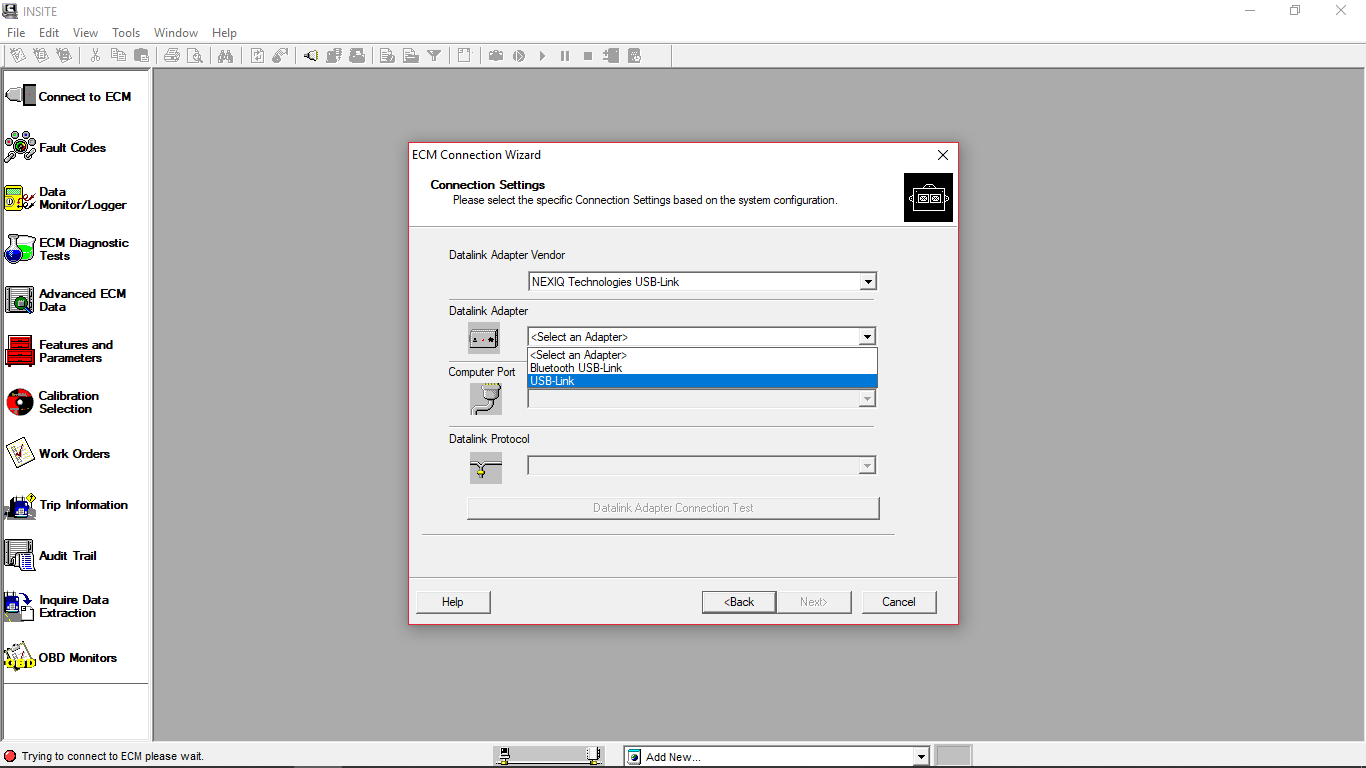
Figure 1.6 – Datalink Adapter
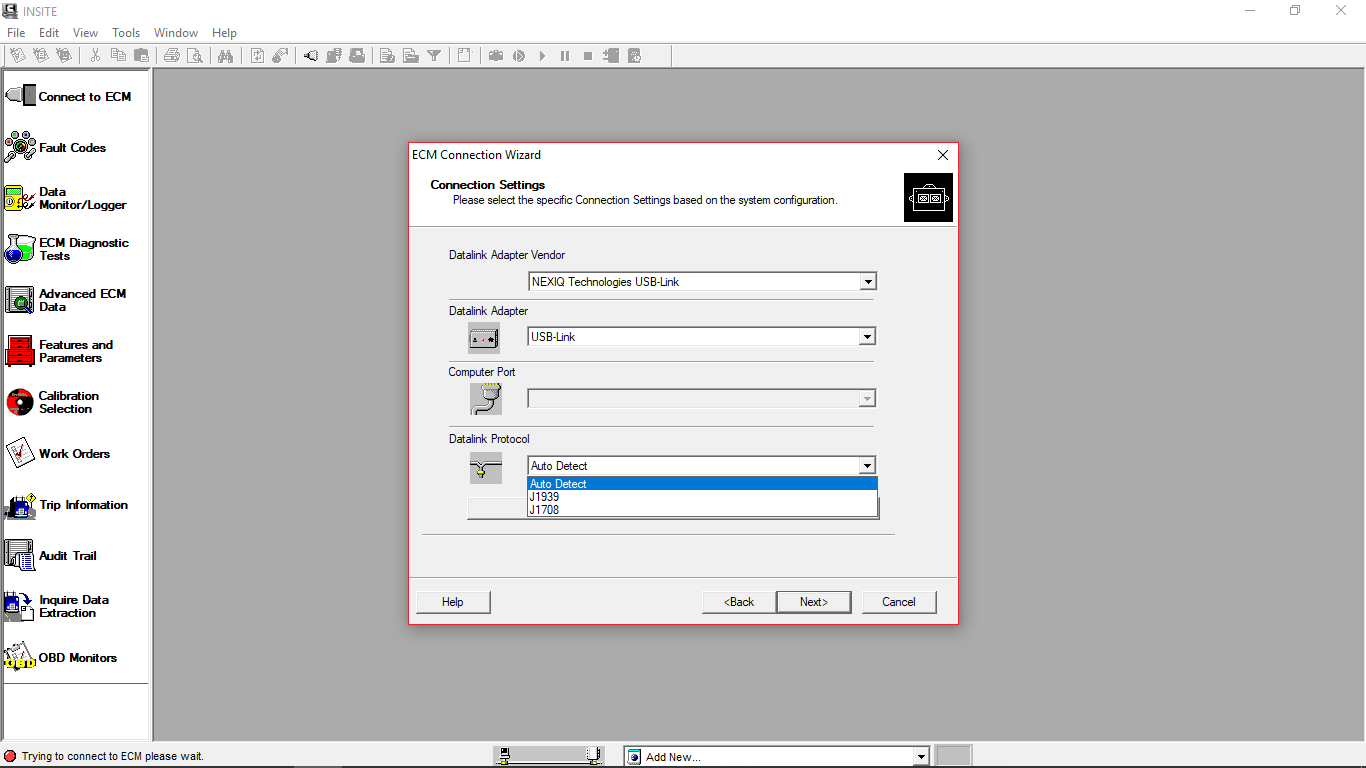
Figure 1.7 – Datalink Protocol
Click “Connect to ECM”
-If you are connecting to a new ECM or an ECM without existing ECM passwords, select “None” in the Security Type: dropdown list.
-If you then want to define ECM security type passwords, select ECM Passwords on the Tools menu once connected to the ECM.
The “Work Order Wizard” is automatically displayed for you to create a work order for the selected connection, then click “OK”. NOTE: You can disable the Wizard from starting automatically by unchecking the Enable Work Order Mode checkbox in the Work Orders page of the Options window.
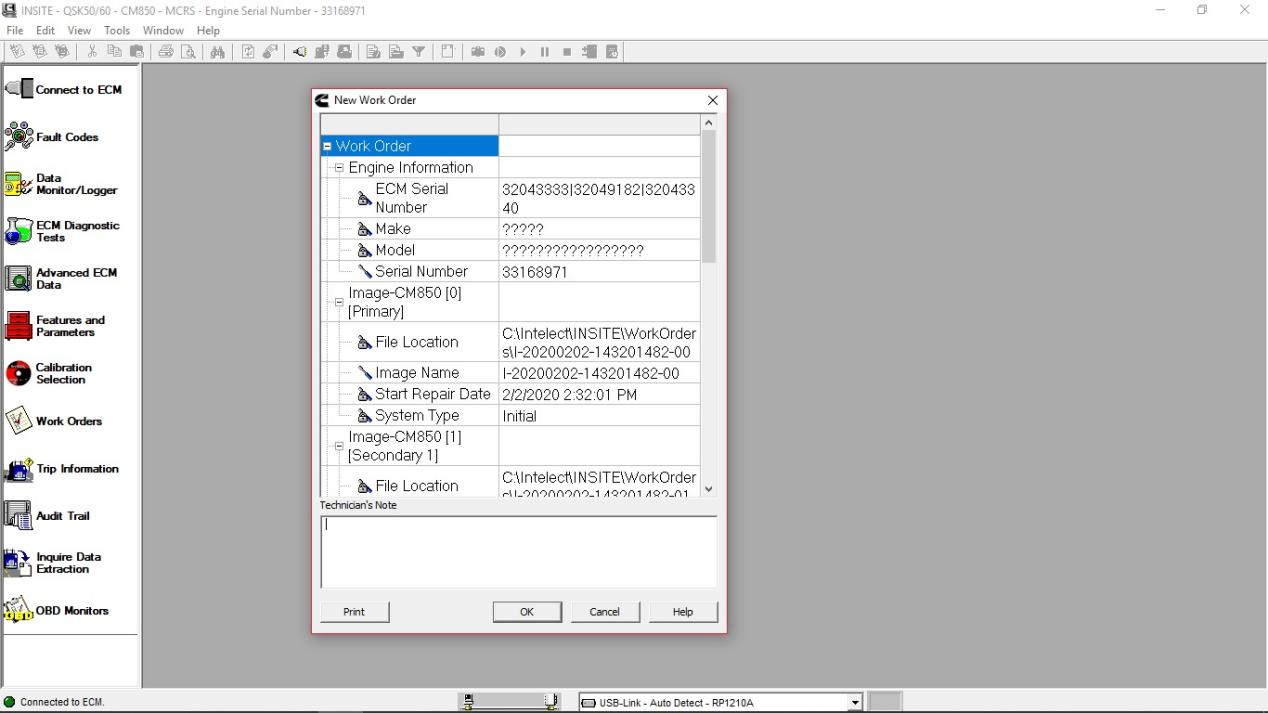
Figure 1.8 – New Work Order
Wait the “Work Order/Image Creation” until 100% of creating image.
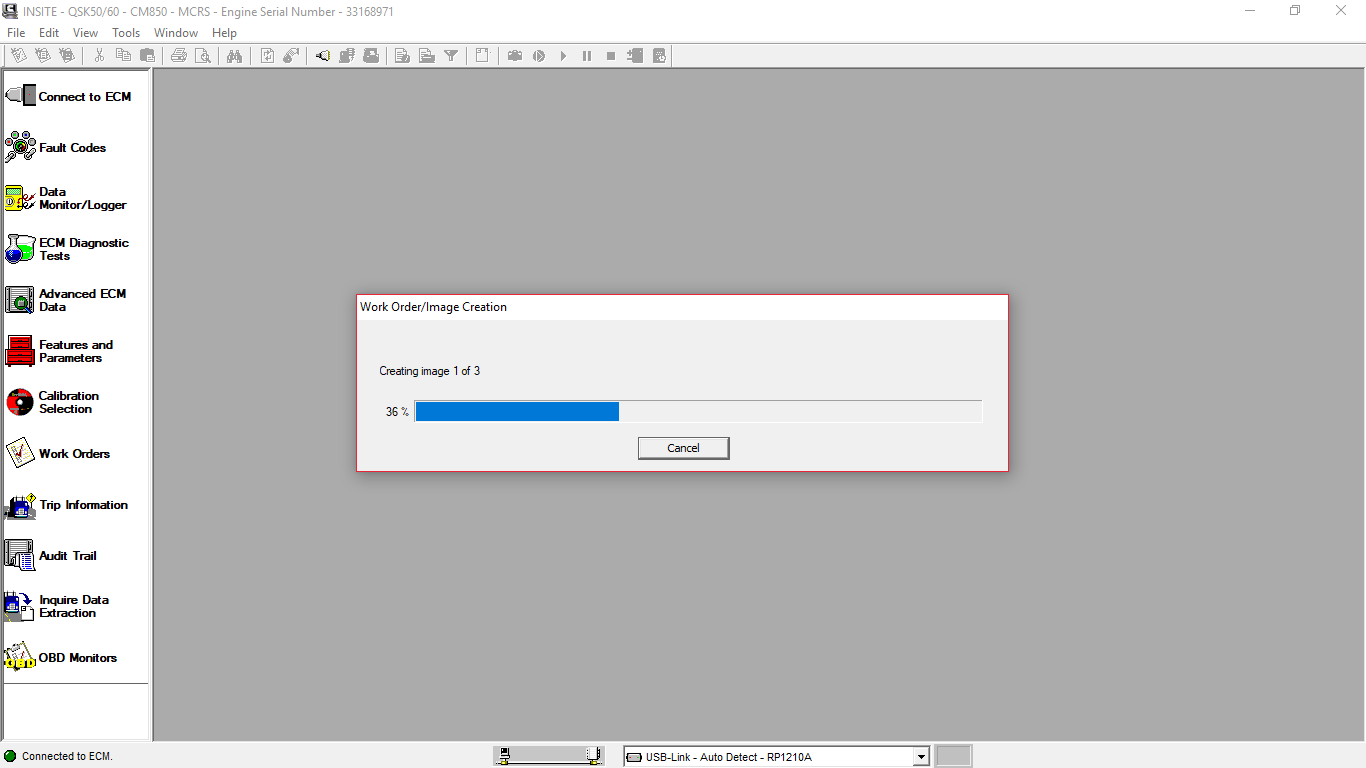
Figure 1.9 – Work Order/Image Creation
For example, “Fault Codes” display on Cummins INSITE software.
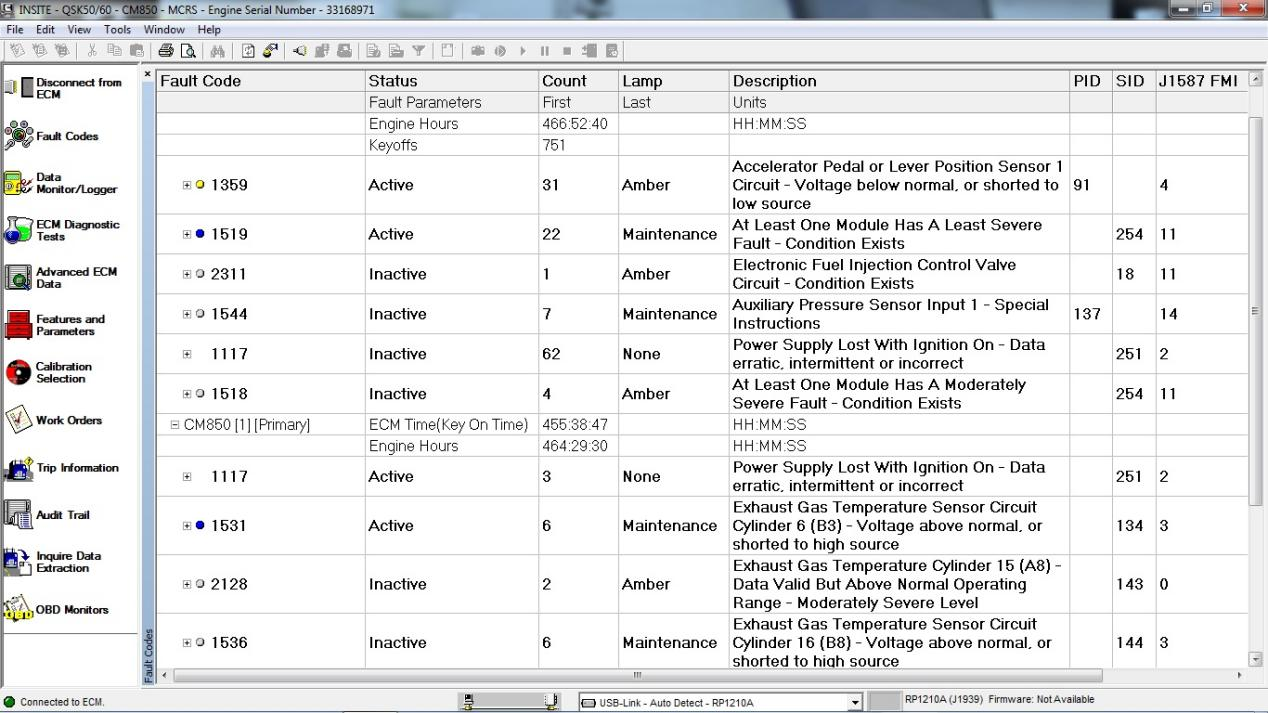
Figure 2.1 – Fault Codes
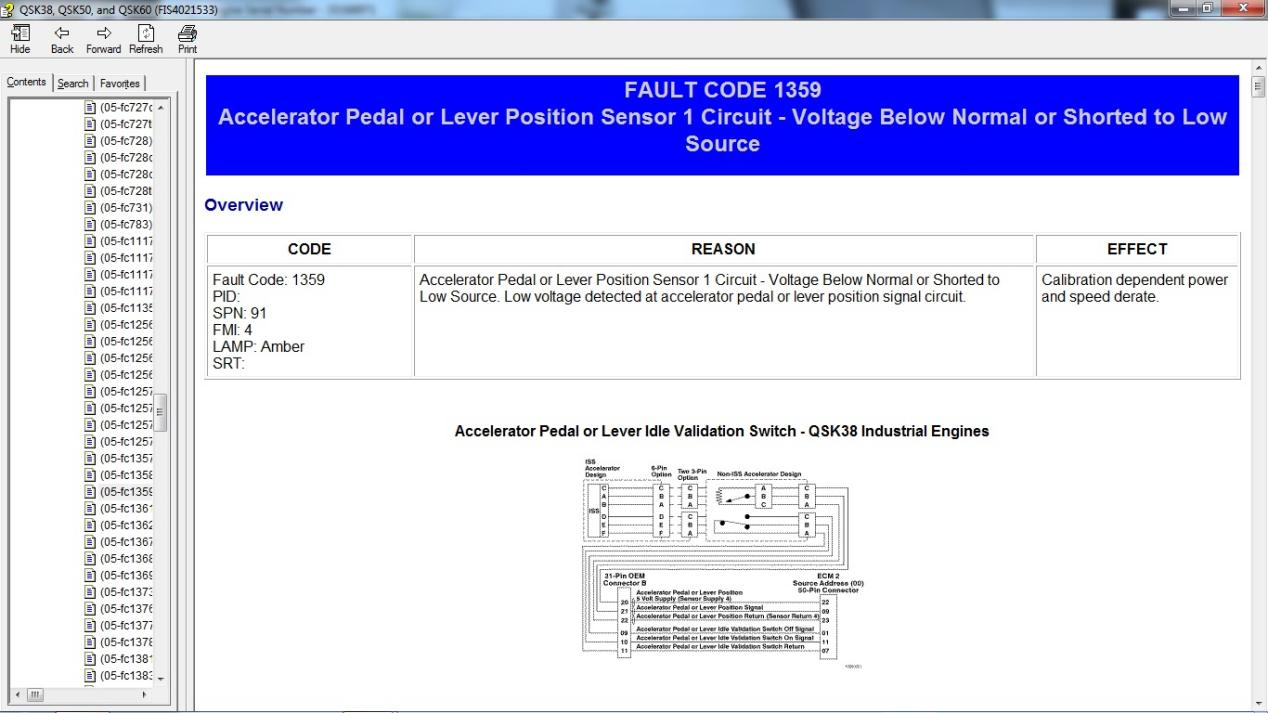
Figure 2.2 – Fault Codes (Overview)
