Once you’re comfortable with Xentry and the larger STAR ecosystem, chances are you’ll want to start fiddling with the various codings and engineering of your van. Before you do, though, remember that this is where things can start to go south if you screw up. That said, it really isn’t as scary as many make it out to be.
DTS Monaco is a complicated and powerful piece of software that has many of the same functions as Xentry, but also allows you to change the engineering and coding of your van, including enabling you to turn off that pesky (and, frankly, dangerous!) lane keep assist for good! While I managed to get going with Xentry pretty quickly, DTS Monaco took longer, mostly because I didn’t really have a good understanding of what I was even looking at. Let me try to walk you through some of the main aspects of this useful and fun piece of software.
ECUs and SMR-d files in DTS Monaco
DTS Monaco connects to your van via many different ECUs that control various functions. For example, your driver’s door has an ECU, your passenger door also has one, so does the MBUX, and on and on it goes. The important thing to understand here is that DTS Monaco needs files that tell the program everything about every single ECU – what it is, what the codings are, etc. This varies depending on exactly what van you have and what options it’s fitted with. For example, for the MBUX in the VS30, if you have the 10” screen, then the ECU is (likely…) “HU6”. If you have the 7” screen, then it’s (likely…) “CONNECT907”.
For DTS Monaco to connect to these ECUs, it needs to know exactly what ECUs you have – which is where Xentry comes in again. In my van, I have 35 ECUs and I got the name of each ECU by clicking through the various units after running a quick test in Xentry – exactly what I showed a few pages up where I identified the “HU6” ECU as the one responsible for the MBUX system. I went through step by step and wrote down all these names and here’s what I got for my 2022 4×4 with the V6 Diesel:
ASBM_HU; BCMFA2; CPC_NG; CR61NFZ; DISP6; DMFL222_MOPF; DMFR222_MOPF; DSM222; ESP907; EZS167; FCW177; FSCM_GEN5; HERMES; HLI_FL247; HLI_FR247; HU6; HVAC_F177; HVAC_F907; IBS177; IC907; IMRR177_R1; IMRR177_R3; MMPC213; OHCM907; ORC177; PARKMAN213; SCCM177; SWSP177; TM205; TPMMFA2; UDCM; VCS177; VG907; VGS4NAG2; WMI213MOPF; WMI213MOPFR
The information DTS Monaco needs for each ECU is provided in “SMR-d” files (or, in earlier versions, CBF files, but you can likely ignore these). These can be found in the Xentry package:
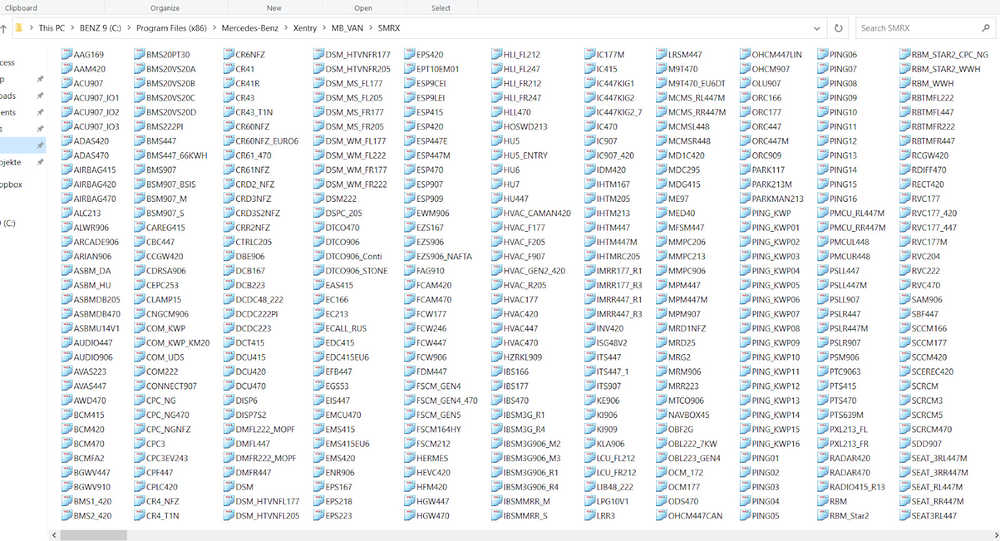
Select the ones you need (for my van, that would be the 35 ECUs above), based on the naming, which will be identical between the ECU and the SMR-d file (for example, notice the “HU6” file in the image above). Once they’re all selected, copy (don’t move) them to a new folder e.g., on your desktop.
Organizing ECU information in DTS Monaco using “Projects”
Once you have the SMR-d files copied to a separate folder, it’s time to import them into DTS Monaco. The way in which the software is organized is via a set of “Projects”, which is essentially a collection of relevant SMR-d files, and “Workspaces”, which is the actual workspace you will be working in when using the program. Each workspace needs a Project to work. Note, in theory you could import (almost) all SMR-d files into a single Project, but because your van won’t have most of the ECUs linked in those SMR-d files, you wouldn’t be able to connect to the referenced ECUs. Also, the Project file size would be huge and the program slow. Similarly, you also don’t need to import all the SMR-d files into a single Project, but could have individual Projects for working on the MBUX system, the engine, the doors, etc. I prefer having a single Project with all the relevant ECUs though, so that is what I will focus on here.
First, let’s boot up DTS Monaco v8:
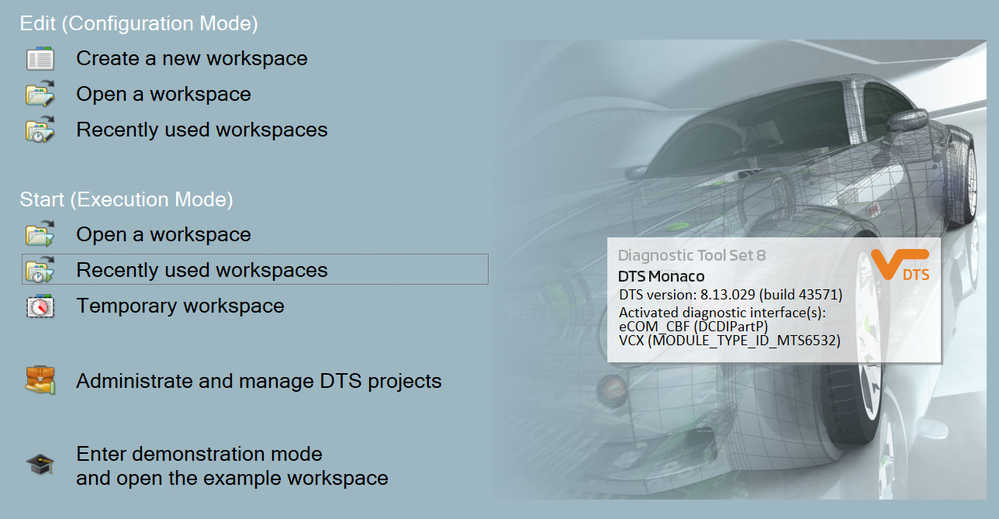
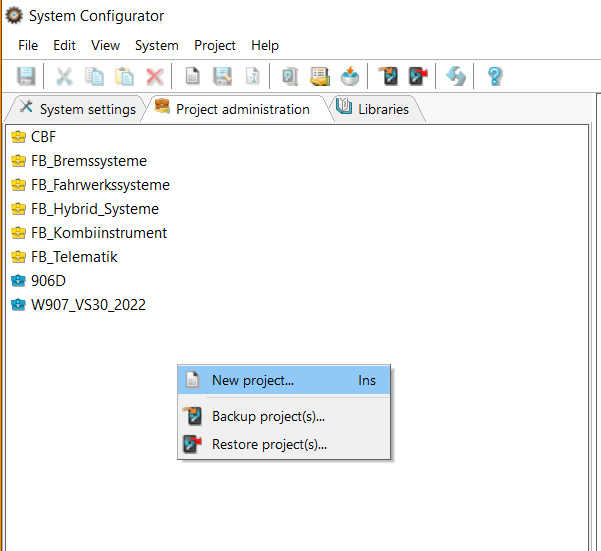
A few things to note here. In the box on the right you’ll see that I have my VCI connected to the computer “VCX (MODULE_xx)”. This is all controlled via “Interfaces”, but more on that later. The “Edit” mode is how we will get our “Workspace” set up, and the “Start” mode is the one we will use to actually run DTS Monaco. More on these later. For now, focus on “Administrate and manage DTS projects”, which is where we will get our SMR-d files imported, and a Project allowing us to connect to all the van’s ECU set up. Click the button and it will start up the System Configurator. In the “Project administration” tab, right click and select “New project”. In the next step, select the “Modular optimized databases” option, which will allow you to import the SMR-d files you previously copied to a new folder.
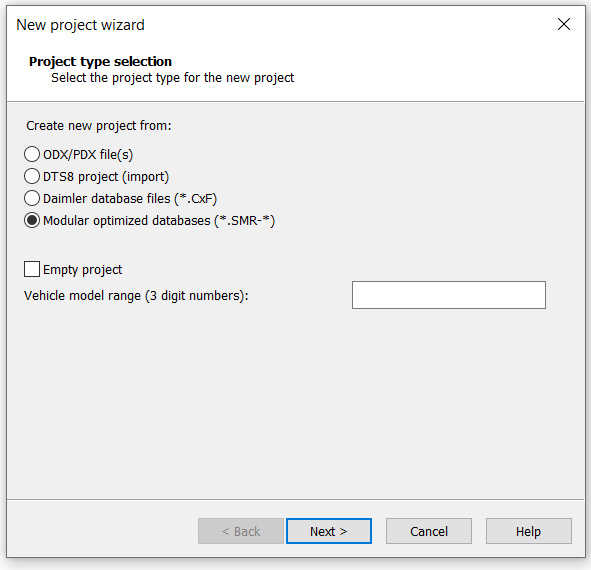
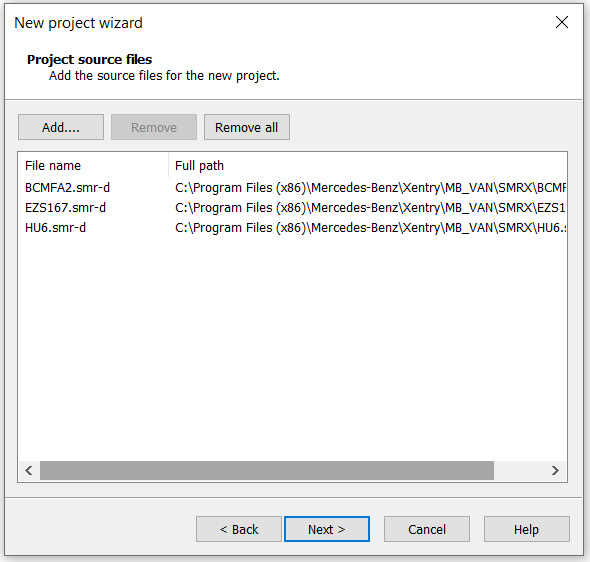
In the following example, I only selected three SMR-d files to keep it simple, however, for the Project I use with my van, I selected all 35 mentioned above. Remember, these are the SMR-d files you previously copied into a new folder from the “MB_VAN/SMRX” subfolder in the Xentry folder (see above).
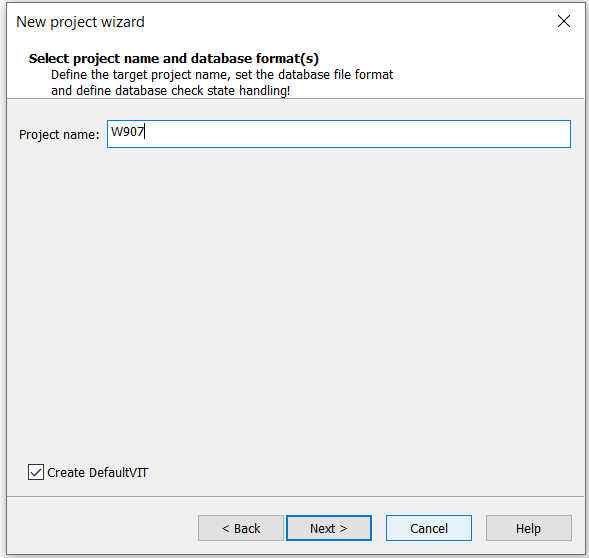
Next, name your Project and click through to create it. I named mine “W907” to reflect the van ID. That’s it.
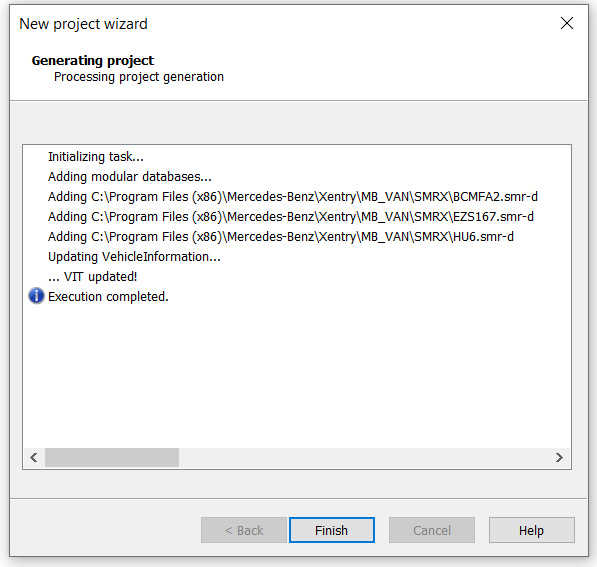
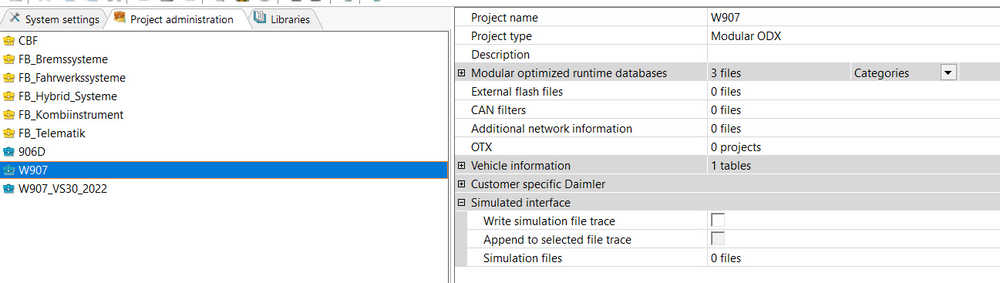
Once you’re back to the “Project administration” tab, you can see all the details about your new Project, including information about the imported SMR-d files, etc.
Once you have successfully created a Project, it’s on to creating a workspace. Note, in the above I created Projects from scratch. It is possible that a Project already exists within the DTS Monaco installation for your van, in which case you can just use that, instead of having to go through the steps of identifying ECUs, copying files, etc. For my van, there wasn’t a relevant Project already, plus, I wanted to figure out how this all works.