Once you have set up a relevant Project, it’s time to create a Workspace so you can start working on your van in DTS Monaco. Remember, Projects are a collection of imported SMR-d files that tells DTS Monaco how to communicate with the various ECUs, whereas Workspaces simply create a set of interfaces that allows you to perform various coding, diagnostic, and engineering tasks on your van.
Go back to the main page of DTS Monaco and under the “Edit” mode, click the “Create a new workspace” button. DTS Monaco has several templates already built-in and we’re simply going to use one of those to get set up. Once set up, you can edit various aspects of your Workspace within DTS Monaco itself.
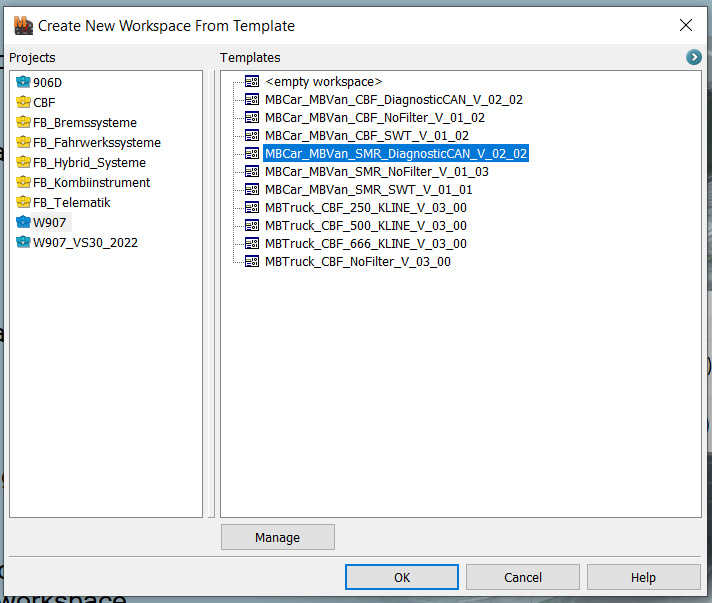
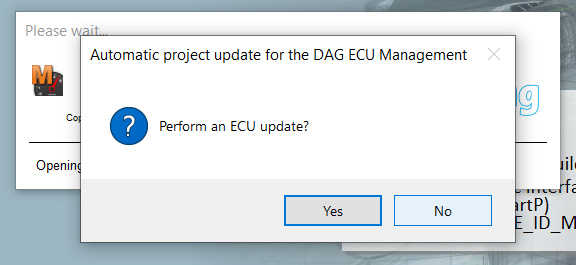
Select the Project you just created and the relevant template. Press “OK”. The main DTS Monaco program will open and as is always the case when you open up the program, it’ll ask you if you want to “Perform an ECU update”. Press “No” (don’t worry if you accidentally press “Yes” – it won’t actually work).
Welcome to DTS Monaco! Once inside the program, press “Save” and give your Workspace a name:

You’re now ready to start working on your van. But first, you need to make sure interfaces are connected.
Checking Interfaces in DTS Monaco
To ensure that DTS Monaco can correctly communicate with your van, you need to make sure that your VCI has been set up correctly. In all likelihood, you don’t need to go through this, but in case you do. From the main screen of DTS Monaco, click the “Administrate and manage DTS projects” button again. This time, head over to “System settings”, where you will see the “Interfaces”. From here, click through to the various modules and make sure your VCI is listed. If you are using the VCX SE, then you need to have the following details, which will likely be similar / the same for other VCIs too:
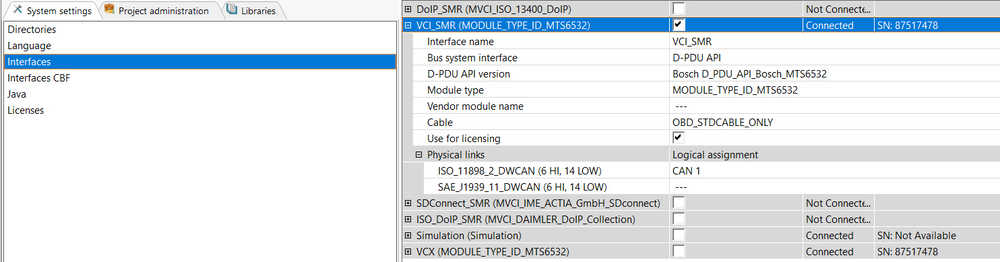
The “tick” box is the currently active interface that’s being used (“VCI_SMR” in my case). Note, there’s also a “Simulation” module, which will allow you to start up DTS Monaco, play around with things, etc., without the need for an actual VCI to be connected. If you right-click on the left-hand side, you’ll see a menu to update your VCI information, allowing you to see what is currently connected to your computer and what is not. In my case, that would be “VCI_SMR, “VCX”, and “Simulation”. The latter will always be shown as connected, since it doesn’t need actual hardware, and the reason why my computer is showing both VCI_SMR and VCX, despite me only having the VCX SE connected, is because those two have identical information. DTS Monaco can only have one VCI connected at a time, so none of this is a problem – I simply created a duplicate for the purpose of writing this guide.
In the “Interfaces CBF” tab, also make sure that the “eCOM_CBF” interface has been ticked off:
Once all of this has been done, you are ready to get coding in DTS Monaco itself. Get excited!